📺 Watch the Full Cooking Video Episode!
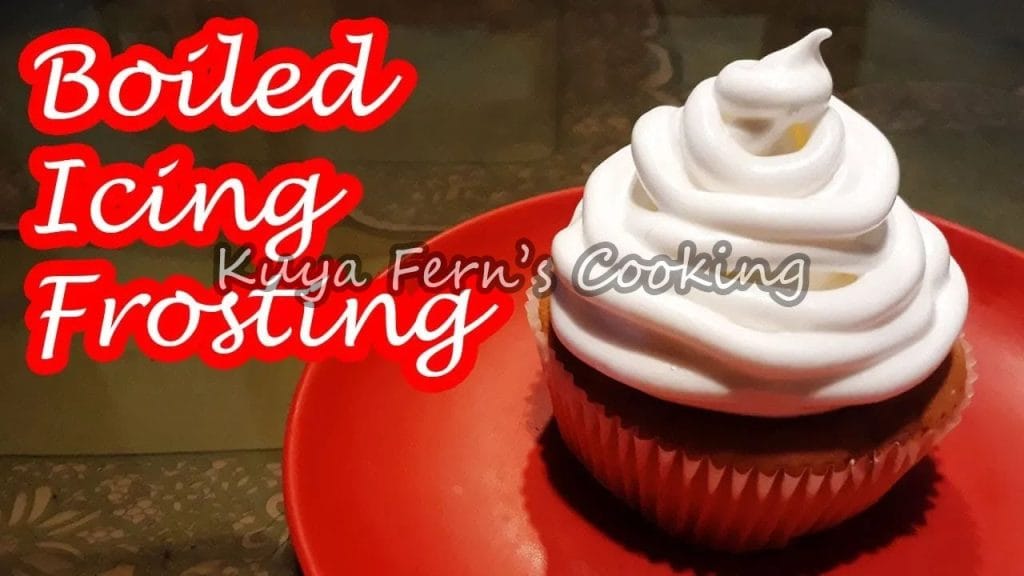
Want to see how The Art of Boiled Icing Frosting is prepared step-by-step? Watch the full cooking video on our Video Hub to see exact heat controls, timing, and real preparation.
Ingredients (Mga Sangkap)
- ✔ 2 cups granulated white sugar: The backbone of our structure, sugar acts not just as a sweetener but as the essential molecular scaffold that gives the icing its body. When sourced from premium, fine-grain crystals, it dissolves into a syrup that captures the very essence of a sunny afternoon in the province.
- ✔ 5 large egg whites, room temperature: These are the heartbeat of the recipe, providing the protein necessary for the aeration that turns a simple syrup into a towering, snowy peak. Using fresh, farm-raised eggs ensures a cleaner flavor profile that dances delicately on the palate without the metallic tang of preservatives.
- ✔ 1/2 teaspoon cream of tartar: This acidic stabilizer is the silent guardian of our frosting, preventing the sugar from crystallizing prematurely and ensuring the egg whites maintain their structural integrity. It is the secret weapon that allows the icing to stand tall, resilient against the humid tropical air of a busy kitchen.
- ✔ 1 teaspoon pure vanilla extract: A splash of liquid gold that rounds out the sweetness with floral, woody notes. The aroma of vanilla swirling through the steam of the double boiler evokes memories of childhood Sundays, where the kitchen was a sanctuary of love and constant baking.
The Nostalgia of the Seven-Minute Miracle
In the heart of every Filipino home, there exists a kitchen rhythm—a symphony of clinking spoons and the hum of a mixer that defines our collective culinary heritage. Boiled icing, often referred to as seven-minute frosting, is not merely a topping; it is a testament to the patience of our grandmothers. It represents a time when baking was an act of devotion, requiring constant attention and a steady hand over the swirling steam of a double boiler. At Mavhic, we believe that this icing captures the soul of the traditional ‘kakanin’ spirit translated into the art of the Western-style sponge cake.
The Science of Stability
Achieving the perfect boiled icing is a dance between temperature and timing. The transformation of raw egg whites and granulated sugar into a stable, meringue-like structure is a marvel of food science. As the heat gently denatures the egg proteins, they unfold and trap air, creating a matrix that is simultaneously light and robust. Unlike buttercream, which relies on the richness of fat, boiled icing relies on the magic of air and sugar, resulting in a clean, sophisticated finish that never cloys the palate. It is the perfect marriage of texture and sweetness, reminiscent of the airy mallows enjoyed during festive town fiestas.
Serving the Masterpiece
Once your boiled icing has reached that elusive, glossy peak, it must be applied with purpose and grace. Because the icing sets relatively quickly, it is best to use a large offset spatula, sweeping the clouds onto your cooled cake in long, confident strokes. The beauty of this frosting lies in its imperfections; the swirls and peaks created by the spatula catch the light, creating a visual feast that is as inviting as a warm hug. Whether topping a chiffon cake or a dense chocolate sponge, boiled icing elevates the dessert into a centerpiece worthy of the most sacred celebrations.
Step-by-Step Cooking Guide
- 1. Prepare the double boiler: Begin by filling a heavy-bottomed saucepan with two inches of water, bringing it to a gentle, rolling simmer that breathes soft steam. Place a glass or metal bowl securely over the top, ensuring the base does not touch the water, creating a gentle, indirect heat source that protects the delicate proteins from curdling.
- 2. Combine the core components: Into the bowl, whisk together the sugar, egg whites, and cream of tartar until the mixture is uniform and slightly frothy. This initial step is an act of patience; as the heat begins to penetrate the bowl, the sugar granules surrender their crunch, transforming into a silky, opaque syrup that promises the indulgence to come.
- 3. The constant whip: Using an electric hand mixer, beat the mixture continuously while it sits over the steam for approximately seven to ten minutes. You will watch in awe as the liquid thickens and expands, growing into voluminous, snowy waves that cling to the beaters like fresh, fallen clouds in the high mountains of Benguet.
- 4. The final finish: Once the icing reaches stiff, glossy peaks, remove the bowl from the heat and add the vanilla extract. Continue to whip the icing for another two minutes as it cools, a process that locks in the aeration and creates a smooth, spreadable texture that mimics the grace of a pristine, white veil draped over a cake.
🛑 Done Reading? Watch the Video Breakdown!
Catch all the practical kitchen tips, taste tests, and full preparation steps for The Art of Boiled Icing Frosting.
▶️ Watch the Full The Art of Boiled Icing Frosting Recipe Episode →
Frequently Asked Questions
- What causes the boiled icing to become gritty? (?) The grittiness occurs if the sugar has not fully dissolved during the heating process or if the mixture was over-beaten once it began to cool. Ensure the sugar is completely smooth to the touch before removing from the heat.
- Can I make boiled icing ahead of time? (?) Boiled icing is best used immediately after preparation. Because it relies on aeration for its volume, it will lose its structural integrity if left to sit for more than a few hours.
- Why did my icing collapse? (?) A collapse is usually due to insufficient beating or adding the vanilla too early. Always ensure you achieve stiff, dry-looking peaks and allow the icing to cool slightly while beating to set the structure.
Original coverage: Watch on YouTube
About The Author