📺 Watch the Full Cooking Video Episode!
Want to see how The Ultimate Homemade Rocky Road Ice Cream A Nostalgic Filipino Kitchen Masterpiece is prepared step-by-step? Watch the full cooking video on our Video Hub to see exact heat controls, timing, and real preparation.
🛑 Done Reading? Watch the Video Breakdown!
Catch all the practical kitchen tips, taste tests, and full preparation steps for The Ultimate Homemade Rocky Road Ice Cream A Nostalgic Filipino Kitchen Masterpiece.
Ingredients Needed
- 2 cups heavy whipping cream, chilled
- 1 can (300ml) sweetened condensed milk
- 1/2 cup high-quality unsweetened cocoa powder
- 1 teaspoon pure vanilla extract
- 1/4 teaspoon fine sea salt
- 1 cup mini marshmallows
- 3/4 cup roasted peanuts, roughly chopped
- 1/2 cup bittersweet chocolate chunks or chips
Origin & Culinary Story
Rocky Road ice cream holds a special place in the Filipino dessert landscape, often associated with childhood afternoon snacks and family birthday parties. While the flavor profile was popularized globally in the 1920s to reflect the tumultuous economic times of the Great Depression, it was adopted into Filipino kitchens through the influence of American-style creamery shops. Filipinos personalized this classic by utilizing local preferences for extra-crunchy roasted peanuts and high-quality condensed milk, which serves as the perfect creamy base for a no-churn method that requires no professional ice cream maker.
The Culinary Experience
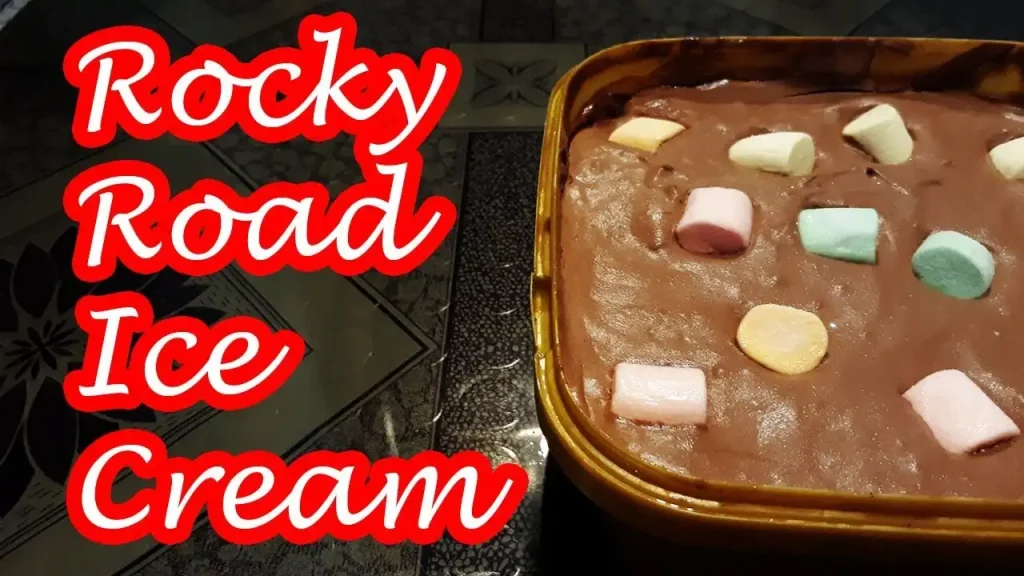
The real character of this masterpiece, however, lies in the inclusions. A true Filipino-style Rocky Road demands a generous, almost reckless amount of texture. The marshmallows provide a soft, chewy contrast to the sharp, salty crunch of roasted peanuts, while the bitter chocolate chunks melt slowly on the tongue. Each spoonful offers a different landscape of flavors, moving from the smooth, cold chocolate velvet to the earthy snap of the nuts and the playful chew of the marshmallows. It is a harmonious balance of texture that makes every bite feel like a discovery.
Serving this homemade treasure is an experience in itself. Because it is made without artificial stabilizers, the ice cream softens beautifully after a few minutes on the counter, reaching the perfect scoopable consistency. Whether served in a simple wafer cone or layered into a chilled glass bowl, this Rocky Road recipe is a nostalgic nod to simpler times. It is a dessert that invites you to slow down, savor the contrast of temperatures, and appreciate the time-honored tradition of handmade confectionery that brings friends and families together around the dinner table.
Step-by-Step Cooking Instructions
- 1Sift the cocoa powder into a large mixing bowl to ensure there are no lumps, then whisk in the sweetened condensed milk, vanilla extract, and salt until the mixture is glossy and completely smooth.
- 2In a separate chilled bowl, whip the heavy cream using a hand mixer or stand mixer until stiff peaks form.
- 3Gently fold one-third of the whipped cream into the chocolate base to lighten the mixture, then carefully fold in the remaining whipped cream until just combined, taking care not to deflate the aeration.
- 4Fold in the mini marshmallows, chopped roasted peanuts, and chocolate chunks until evenly distributed throughout the base.
- 5Transfer the mixture into a freezer-safe container, smoothing the top with a spatula.
- 6Cover the surface directly with parchment paper or plastic wrap to prevent ice crystals, seal the container, and freeze for at least 6 to 8 hours or preferably overnight until firm.
Kitchen Secrets & Pro Tips
- Chill your mixing bowl and beaters in the freezer for 15 minutes before whipping the cream to ensure maximum volume and stability.
- Toast your peanuts in a dry pan for two minutes before chopping them to intensify their aroma and ensure they stay crunchy even after being frozen.
- Use a high-fat cocoa powder to achieve a richer, more professional chocolate flavor that stands up well to the sweetness of the condensed milk.
- Add a tablespoon of dark rum or coffee liqueur to the chocolate base for a more sophisticated flavor profile that cuts through the richness of the cream.
Frequently Asked Questions
- Can I use regular milk instead of condensed milk? No, the condensed milk is essential for the no-churn texture as it provides the necessary sugar and thickness to keep the ice cream creamy without an ice cream maker.
- How long can I store this in the freezer? This ice cream will stay fresh and delicious for up to two weeks if kept in an airtight, freezer-safe container.
- Can I substitute the peanuts? Yes, you can use toasted almonds or cashews if you prefer a different flavor profile, though peanuts are the traditional choice for that classic salty-sweet crunch.
Disclaimer: This recipe guide is created for educational purposes and the preservation of Filipino culinary culture.
About The Author